Tuesday, October 30, 2012

5 Simple Must Have items for painting furniture


This post came about in a funny way.  After losing the same items over and over in my garage, I began to think that I am unorganized and beyond hope.  I decided to solve this little problem by making sure that I had at least 2 of my “necessary” items on hand, so that when I really needed them, I could put my hands on at least one.  Yes, I know “everything in its proper place…”.  But, this works for me –okay?  


So what are these items that I am constantly using and always losing?  They are so basic, it’s almost silly to post about them,  But, I’ll bet there’s at least one person out there like me who needs to go ahead and buy 2 just in case one is ummm…misplaced :)

For painting furniture, these are my go-to items:


1- Purdy Cub paintbrush
Yes, there are tons of other paintbrushes out there, but for me and my small hands, the cub is my BFF.  And if you take good care of it, it will last for a long, long time.


purdy cub
image via


2-  Plastic Scraper
This simple and inexpensive tool comes in various widths.  Buy several; they are cheap.  They are great for scraping off excess paint after sanding and for getting the goo off left over from labels and stickers.
plastic scraper
image via


3- Paper plates
Again simple and inexpensive.  I almost never use the paint trays that they sell at the home improvement stores, unless I’m using a roller.  And that’s really ,really rare.  So a good ole paper plate does the trick for mixing colors, thinning paint, and providing a disposable palette.
paper plates
image via


4- Drop cloth
Yes, you can use old sheets, towels, blankets, etc. to paint on.  I have done that and still do sometimes.  But in my experience, nothing beats the drop cloth!  The seams on a drop cloth are weighted just a bit.  So, as you are painting that end table, a big gust of wind doesn’t come along and blow your sheet over the freshly painted side of the table causing it to stick.  Don’t ask me how I know!  The big box stores charge quite a bit for drop cloths, but I’ll tell you a secret.  Shhh… If you are lucky enough to have a Big Lots in your town, buy your drop cloths there.  They are half the price.  And if you are really frugal like I am, you can cut off one whole panel or at least six inches or so along one side to get crafty with.  Make yourself a banner like this Candy Corn Banner

pumpkin bunting


5-Baby wipes
What can I say, painting is messy, and I like to hide the evidence- quick!  No really, baby wipes are wonderful to have on hand, because they stay wet all the time and are portable and handy.  I buy the generic- whatever is on sale type.

wipes
image via


Okay, I’ll bet you are really ready to tackle a big ole painting project now huh?  Doubtful, but I did want to share a few of my favorite little things that keep me going as I paint all kinds of furniture with different kinds of paint.  There are so many other cool tools out there, but these top 5 are “must have’s “ for me to even get started.  Maybe I’ll talk about paint next, or how to choose a good piece of furniture…. keep reading along.


Share:  What are your favorite painting “tools” ?  You can leave a comment here on the blog, or on my Facebook page.  I’d love to know what you find invaluable.  A few of my Facebook friends have already chimed in.  Go check it out.  And “like” my page to keep updated.  You never know what I may come up with next….



Joining these great parties:
 Tutorials and Tips at Home stories A to Z
Meet me Monday at You're Talking too Much 

Tuesday, October 23, 2012

Yellow Sunburst Dresser


stenciled sunburst dresser

So, how do you like her?  Ain’t she a beauty?   I’m not shy!  I worked hard on this baby!  I wanted her to stand out! 

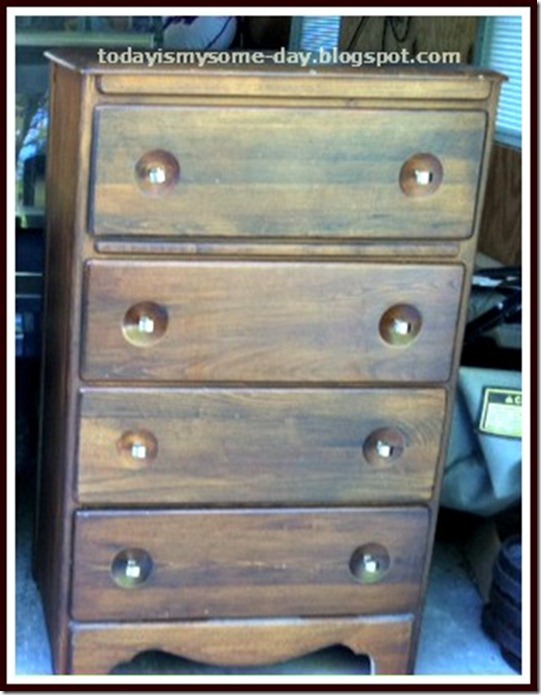
My before pictures stink, as always.  No need for e-mails or comments stating the obvious.  I always rush right in to get rid of the ugly.  It’s so hard to remember to document the ugly.  But here’s what evidence I have of the before.  Not bad… just old and brown.

dresser before.jpg

But see those “indentations” around the knobs?  I loved those things!  They were screaming for attention!  So, I painted the body of the dresser with 2 coats of Annie Sloan’s Old White.  I painted the drawers with 2 coats of Annie Sloan’s Arles.  And I stalled… and waited… and searched Pinterest for inspiration.  Nothing.
I read a quote on Miss Mustard Seeds blog about this time that said
“there is almost always a point as I’m working on a piece of furniture when I hate it and want to haul it to the closest thrift store just to get it out of my sight. I resist that urge, though, knowing it’s going to look amazing in the end”
This was me at that moment!  But hey, if MMS didn’t give up, I certainly wasn’t going to!
I got out my sanding block and roughed up the edges of the body and drawers, which I will say brought me GREAT JOY!  This piece sanded so easily!  Mostly because of the chalk paint, but also because the piece is old and solid maple with no finish to speak of.  It was like butta…
I used Annie Sloan’s clear and dark wax on the body of the chest, and then I stared at those drawers….  I repainted the pulls with my trusty Oil Rubbed Bronze.  Can’ t live without that stuff!

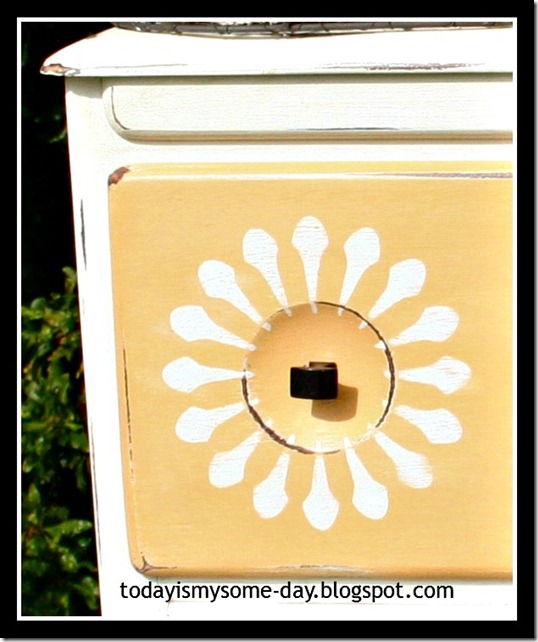
Then I remembered that I have a Silhouette machine!  Hello???  I went into to the 99 cent Silhouette store and shopped ‘til my heart was content.  Well, I actually spent like $3.96, but I was sure that something I bought might work as a stencil on those drawer fronts.  I played around with sizing and cutting etc.  I finally found what I was looking for.  (Take THAT Bono!)  I cut it out on heavy cardstock and used it for a stencil.  I then spent the next 27 hours (more like 2 hrs, but my back was killing me), hand stenciling those “flowers” around the drawer pulls.  SO WORTH IT! 

To finish off I sanded the drawer fronts and flowers and sealed with dark and clear wax.

I’m in furniture love….

flowerhalf.jpg
Hey! Don’t let that fabulous scale distract you from the dresser!  That’s for another post.  Stay innn the moment….

stencil flower dresser.jpg

Now, I’m off to hate another piece of furniture ‘til I love it!  Honestly, that really is how it works.  For me and Miss Mustard Seed :) !  Catch you later.


Linking up to these great parties:
You are talking too much Meet Me Monday

Happy Hour at Crafty, Scrappy, Happy

Furniture Feature Friday at Miss Mustard Seed

Weekend bloggy reading at Serenity Now 
Inspiration Friday at The Picket Fence 
Whipperberry Friday Flair 
Sundae Scoop at I heart Naptime

Wednesday, September 26, 2012

Halloween Chair- Saw it- Made my own


I first saw this idea for a Halloween chair on Facebook.  The link led me to a blog post by asentimentallife where she found this amazing chair at Goodwill already painted up!  What a cutie and a great find!

sentimental life halloween chair 
photo credit: http://asentimentallife.blogspot.com/2010/10/vintage-finds.html
 

I started thinking about making one of my own and putting it in my booth to spice it up for Fall. 

I looked through my stash of chairs.  See photo here.  Remember- don’t judge :)

brown chair.jpg

I spray painted it black with Rustoleum x 2 in a black matte finish.  I tried to avoid the seat but didn’t bother to tape it off.  I kind of regretted that later on…


Once the black paint was dry, I taped off the spindles closest to the chair and the little curved side pieces.  Then I painted away with Valspar’s Autumn Blaze.  It’s ORANGE! As in –construction zone- but that’s what I was looking for in this chair…. Just need to find some more bright orange projects to use up this quart!

I used my Silhouette to cut a Jack-o-Lantern face stencil out of cardstock.  I taped it on with painters tape and used a make-up sponge wedge to apply the paint. I peeled it back and revealed the cutest little punkin’ face you ever did see :)


pumpkin chair seat.jpg


I hand distressed the black with a little sanding block and fancied her up with some raffia and some Halloween candy corn ribbon.


chairback.jpg

And here she is ….

pumpkin chair full.jpg

I hope someone likes her, and she finds a place of honor amidst a sea of mums on a beautiful covered porch… Or if not, she can sit on my porch, and my kids will love her!


Happy Fall,


This Post featured at:
Craft Junkie Too Friend


Partying with:

Happy Hour Link Party at Crafty, Scrappy, Happy

  Lil\'Luna
The Shabby Nest

Craft Junkie Too Friend

Wednesday, September 19, 2012

The Beachy Blue Desk


I have painted a LOT of furniture in the last few months, and I have not blogged about hardly any of it.  Not only that, but I have been horrible about taking “before” pictures of my victims…  In the case of this desk makeover, I have only a couple of pictures, and for some reason, they are pictures of only half of the desk..?…  Don’t know why.  I picked up this desk at Goodwill.  I was immediately drawn to it because of these babies :)


glass knobs.jpg

Yes!  Glass pulls and knobs!  Actually I had to buy a badly damaged waterfall dresser and mirror along with the desk just to get this desk.  It was to be sold as a set at Goodwill, and they wouldn’t split it up.  Lord knows when I’ll get around to tackling the peeling veneer on that dresser!  But that’s another post.

The desk was painted an evil, horrible spearmint white with the drawer fronts a pale pepto pink.  It was not pretty; it was filthy.  But those glass handles…ahhh… they called out to me.


glass knobs on dresser.jpg

Here’s the half of the desk photo that I took.  Again, no idea why? As you use your imagination, you’ll guess that the other side of the desk is identical :)

pink dresser.jpg


So, I took off the precious hardware and scrubbed and scrubbed this baby 'til it hurt!  Then I decided to paint the base in Annie Sloan’s Old White and the drawer fronts in a mix of Old White and Duck Egg Blue.  You just can’t go wrong with that combination. 

Then the headaches started… The evil, horrible spearmint white that I pointed out earlier began to rear its ugly head!  The Old White gives great coverage, but honestly, that spearmint white wanted to be seen!  It’s hard painting “white over white”; at least it is for me.  It’s because you can’t see clearly if you’ve got really good coverage all over like you can if you are painting a light over a dark color.  But I digress…  After 2 coats and many touch ups and a very light distressing (because too much distressing revealed too much spearmint), I finally got the body like I wanted it.  the drawers were fun!  I just painted them Old White and dry brushed Duck Egg Blue over in one direction.  I just eye-balled it and did it however I liked it.

duck egg drawer front.jpg

At first I put the desk in my booth with no chair.
No sell…

desk no chair.jpg

Then I added a chair from my out of control stash… Hey, DON'T JUDGE!

chair stash.jpg

Muuuchhh better…

desk collage.jpg
Please excuse the weird collage borders.  Pic Monkey and I are just now making friends!

Finally, I had the privilege of being in the shop when a very sweet lady came in and purchased my desk to put in her beach home.  She loved it, and I was happy to see it go to a place where it would fit right in.

 wtoc beach photo
image via


deak and chair.jpg


Here’s wishing you never find any spearmint white paint, but that you luck up and find some fabulous glass pulls…


Linking up at these great parties:

Happy Hour party at Crafty Scrappy Happy, Design, Dining, and Diapers, and Craftberry Bush


Wednesday, August 29, 2012

Welcome back Scrabble


I’ve been scouring the thrift stores looking for original Scrabble games to use in a little project that’s been brewing in my brain for quite some time.  I’ve seen lots of Scrabble art- big and small.  And this may not be an original idea, but it’s original in my tiny world, and it makes me smile : ) 

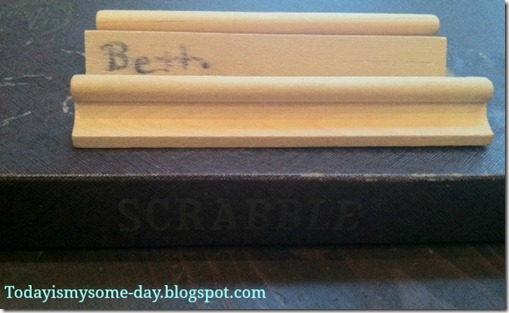
scrabble bare.jpg

This set belonged to “Beth”, and she was quite attached to it.  All of the owner’s paperwork was filled out and many of the trays were labeled with her name.  I’m sure she played many games of Scrabble at her friends’ houses, but wanted to be sure she got all of her pieces back!
Well, since this set was from the 60’s, I’m sure that “Beth” wouldn’t mind if I updated it a little…

welcome scrabble.jpg


just in scrabble.jpg

onsale scrabble.jpg

I’m using these little beauties all around my booth on my furniture pieces to attract the customers’ eye and to show off some of my paint colors and finishes.  These are just some basic Annie Sloan colors with a little distressing and dark and clear wax.  But I have more trays and plan to mix some colors and make more eye candy in the near future. 

turquoise distressed table and scrabble tile.jpg

I used a single piece of scotch tape on the back of each word to keep the letters together.  It has worked great!  The “Welcome”  below has been in my booth for a couple of months, and it’s still in tact despite my own kids and other shoppers’ kids playing with it.


Have you played any Scrabble lately?


  Linking up to these great parties:  
 

UndertheTableandDreaming
A Diamond in the Stuff

Thursday, August 9, 2012

Our Big Hometalk Thrifting Trip


When Debbie at Refresh Restyle contacted me to ask if I wanted to be a part of a thrifting day, I jumped at the chance!  I {heart} thrifting! 

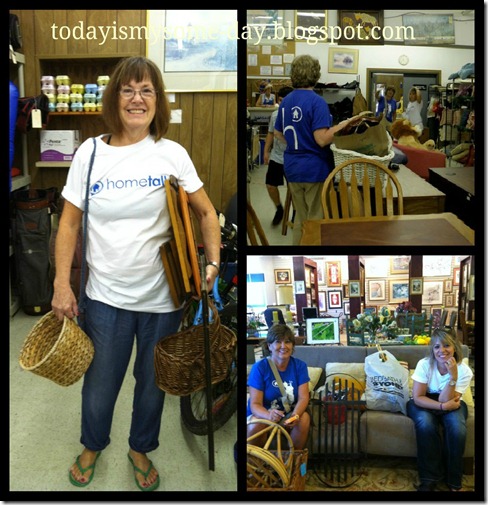
When I found out that Hometalk was sending 8 of us out on this little journey with matching T-shirts, I was beyond excited!

Here, we are before we hit the road.  We paired up in teams of 2, kind of like the Amazing Thrifting Race!  Not really, we were all pretty civil; we just needed 4 vehicles to haul our goodies back home. 

thrifting group shot

We drove and chatted with much excitement!  We got lost; we waited in line to get in to one store while instructions were blasted over a loud speaker (serious business!)  We walked/ran through stores.  We sat on/claimed furniture as our own.  We found treasures for ourselves and for our sister thrifters.

inside thriftcollage.jpg

 Mary and I packed and re-packed our vehicles several times.  Toward the end of the day, I heard bids going on for the last amount of space available in Cherry’s vehicle!

rearranging.jpg

Our Loot:

ourloot.jpg

I’ll be posting some pictures later on of the makeovers or makeunders of the things I thrifted on this trip. 
But for the sake of fun, I wanted to show you a few of the things that we DIDN’T buy!  You know the kinds of things that non-thrifters think all thrift stores are filled with…
Here we go.  Giggle :)

None of this came home with us….

weird thrift.jpg

How about live music at the thrift store on the weekends?  He was singing Elvis, I believe…

guitar.jpg


We got so much great stuff.  I still can’t believe it.  We shopped ‘til we almost dropped!  Didn’t stop for lunch until almost 4 p.m. 

lunch photo.jpg

Our Thrifty Sisters were Debbie from The Smart Set; Karen and Mary from Cotton*Wood Furnishings; Cherry from Cherry’s in the Garden and More; Sarah from Unto the Rainbow; Ann from Shabby French Cottage Basement; and our Coordinator for the event Debbie from Refresh Restyle.

Besides our loot, our lunch and conversation was the best part of the day!  Girlfriends chatting it up about everything from bargains, to paint, to woodworking, to relationships.  We had the best time!  We are hatching a plan to do another one of these trips very soon…  Thanks Hometalk!


End of the day ~Everyone's haul....

Happy Thrifting!

Kim