Wednesday, September 26, 2012

Halloween Chair- Saw it- Made my own


I first saw this idea for a Halloween chair on Facebook.  The link led me to a blog post by asentimentallife where she found this amazing chair at Goodwill already painted up!  What a cutie and a great find!

sentimental life halloween chair 
photo credit: http://asentimentallife.blogspot.com/2010/10/vintage-finds.html
 

I started thinking about making one of my own and putting it in my booth to spice it up for Fall. 

I looked through my stash of chairs.  See photo here.  Remember- don’t judge :)

brown chair.jpg

I spray painted it black with Rustoleum x 2 in a black matte finish.  I tried to avoid the seat but didn’t bother to tape it off.  I kind of regretted that later on…


Once the black paint was dry, I taped off the spindles closest to the chair and the little curved side pieces.  Then I painted away with Valspar’s Autumn Blaze.  It’s ORANGE! As in –construction zone- but that’s what I was looking for in this chair…. Just need to find some more bright orange projects to use up this quart!

I used my Silhouette to cut a Jack-o-Lantern face stencil out of cardstock.  I taped it on with painters tape and used a make-up sponge wedge to apply the paint. I peeled it back and revealed the cutest little punkin’ face you ever did see :)


pumpkin chair seat.jpg


I hand distressed the black with a little sanding block and fancied her up with some raffia and some Halloween candy corn ribbon.


chairback.jpg

And here she is ….

pumpkin chair full.jpg

I hope someone likes her, and she finds a place of honor amidst a sea of mums on a beautiful covered porch… Or if not, she can sit on my porch, and my kids will love her!


Happy Fall,



This Post featured at:

Craft Junkie Too Friend


Partying with:

Happy Hour Link Party at Crafty, Scrappy, Happy

  Lil\'Luna
The Shabby Nest

Craft Junkie Too Friend

Wednesday, September 19, 2012

The Beachy Blue Desk


I have painted a LOT of furniture in the last few months, and I have not blogged about hardly any of it.  Not only that, but I have been horrible about taking “before” pictures of my victims…  In the case of this desk makeover, I have only a couple of pictures, and for some reason, they are pictures of only half of the desk..?…  Don’t know why.  I picked up this desk at Goodwill.  I was immediately drawn to it because of these babies :)


glass knobs.jpg

Yes!  Glass pulls and knobs!  Actually I had to buy a badly damaged waterfall dresser and mirror along with the desk just to get this desk.  It was to be sold as a set at Goodwill, and they wouldn’t split it up.  Lord knows when I’ll get around to tackling the peeling veneer on that dresser!  But that’s another post.

The desk was painted an evil, horrible spearmint white with the drawer fronts a pale pepto pink.  It was not pretty; it was filthy.  But those glass handles…ahhh… they called out to me.


glass knobs on dresser.jpg

Here’s the half of the desk photo that I took.  Again, no idea why? As you use your imagination, you’ll guess that the other side of the desk is identical :)

pink dresser.jpg


So, I took off the precious hardware and scrubbed and scrubbed this baby 'til it hurt!  Then I decided to paint the base in Annie Sloan’s Old White and the drawer fronts in a mix of Old White and Duck Egg Blue.  You just can’t go wrong with that combination. 

Then the headaches started… The evil, horrible spearmint white that I pointed out earlier began to rear its ugly head!  The Old White gives great coverage, but honestly, that spearmint white wanted to be seen!  It’s hard painting “white over white”; at least it is for me.  It’s because you can’t see clearly if you’ve got really good coverage all over like you can if you are painting a light over a dark color.  But I digress…  After 2 coats and many touch ups and a very light distressing (because too much distressing revealed too much spearmint), I finally got the body like I wanted it.  the drawers were fun!  I just painted them Old White and dry brushed Duck Egg Blue over in one direction.  I just eye-balled it and did it however I liked it.


duck egg drawer front.jpg

At first I put the desk in my booth with no chair.
No sell…

desk no chair.jpg

Then I added a chair from my out of control stash… Hey, DON'T JUDGE!

chair stash.jpg

Muuuchhh better…

desk collage.jpg
Please excuse the weird collage borders.  Pic Monkey and I are just now making friends!

Finally, I had the privilege of being in the shop when a very sweet lady came in and purchased my desk to put in her beach home.  She loved it, and I was happy to see it go to a place where it would fit right in.

 wtoc beach photo
image via


deak and chair.jpg


Here’s wishing you never find any spearmint white paint, but that you luck up and find some fabulous glass pulls…


Linking up at these great parties:

Happy Hour party at Crafty Scrappy Happy, Design, Dining, and Diapers, and Craftberry Bush


Wednesday, August 29, 2012

Welcome back Scrabble


I’ve been scouring the thrift stores looking for original Scrabble games to use in a little project that’s been brewing in my brain for quite some time.  I’ve seen lots of Scrabble art- big and small.  And this may not be an original idea, but it’s original in my tiny world, and it makes me smile : ) 

scrabble bare.jpg

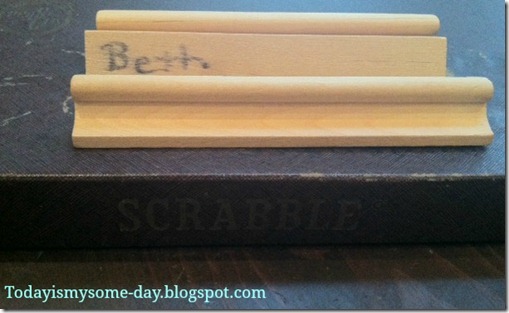
This set belonged to “Beth”, and she was quite attached to it.  All of the owner’s paperwork was filled out and many of the trays were labeled with her name.  I’m sure she played many games of Scrabble at her friends’ houses, but wanted to be sure she got all of her pieces back!
Well, since this set was from the 60’s, I’m sure that “Beth” wouldn’t mind if I updated it a little…

welcome scrabble.jpg


just in scrabble.jpg

onsale scrabble.jpg

I’m using these little beauties all around my booth on my furniture pieces to attract the customers’ eye and to show off some of my paint colors and finishes.  These are just some basic Annie Sloan colors with a little distressing and dark and clear wax.  But I have more trays and plan to mix some colors and make more eye candy in the near future. 

turquoise distressed table and scrabble tile.jpg

I used a single piece of scotch tape on the back of each word to keep the letters together.  It has worked great!  The “Welcome”  below has been in my booth for a couple of months, and it’s still in tact despite my own kids and other shoppers’ kids playing with it.


Have you played any Scrabble lately?


  Linking up to these great parties:  
 

UndertheTableandDreaming
A Diamond in the Stuff

Thursday, August 9, 2012

Our Big Hometalk Thrifting Trip


When Debbie at Refresh Restyle contacted me to ask if I wanted to be a part of a thrifting day, I jumped at the chance!  I {heart} thrifting! 

When I found out that Hometalk was sending 8 of us out on this little journey with matching T-shirts, I was beyond excited!

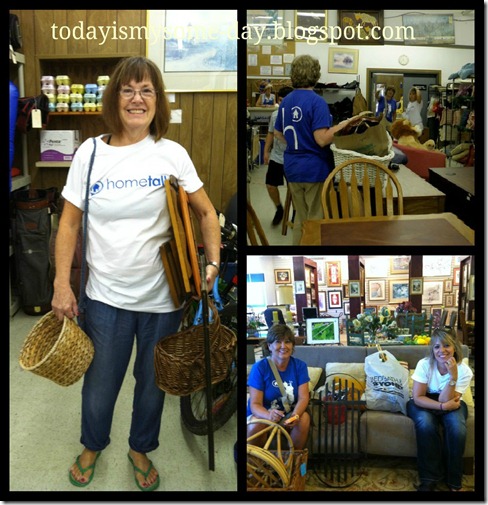
Here, we are before we hit the road.  We paired up in teams of 2, kind of like the Amazing Thrifting Race!  Not really, we were all pretty civil; we just needed 4 vehicles to haul our goodies back home. 

thrifting group shot

We drove and chatted with much excitement!  We got lost; we waited in line to get in to one store while instructions were blasted over a loud speaker (serious business!)  We walked/ran through stores.  We sat on/claimed furniture as our own.  We found treasures for ourselves and for our sister thrifters.

inside thriftcollage.jpg

 Mary and I packed and re-packed our vehicles several times.  Toward the end of the day, I heard bids going on for the last amount of space available in Cherry’s vehicle!

rearranging.jpg

Our Loot:

ourloot.jpg

I’ll be posting some pictures later on of the makeovers or makeunders of the things I thrifted on this trip. 
But for the sake of fun, I wanted to show you a few of the things that we DIDN’T buy!  You know the kinds of things that non-thrifters think all thrift stores are filled with…
Here we go.  Giggle :)

None of this came home with us….

weird thrift.jpg

How about live music at the thrift store on the weekends?  He was singing Elvis, I believe…

guitar.jpg


We got so much great stuff.  I still can’t believe it.  We shopped ‘til we almost dropped!  Didn’t stop for lunch until almost 4 p.m. 

lunch photo.jpg

Our Thrifty Sisters were Debbie from The Smart Set; Karen and Mary from Cotton*Wood Furnishings; Cherry from Cherry’s in the Garden and More; Sarah from Unto the Rainbow; Ann from Shabby French Cottage Basement; and our Coordinator for the event Debbie from Refresh Restyle.

Besides our loot, our lunch and conversation was the best part of the day!  Girlfriends chatting it up about everything from bargains, to paint, to woodworking, to relationships.  We had the best time!  We are hatching a plan to do another one of these trips very soon…  Thanks Hometalk!


End of the day ~Everyone's haul....

Happy Thrifting!

Kim

Friday, July 27, 2012

*Surprise your Friends* Daytime “Sleepover” Party


I can’t believe my little girl is 7 years old already!  We were planning a party for a couple of weeks from now.  But, we had some scheduling conflicts, and I had to put the party together in 3 days!  This is UNHEARD of in this house!  Normally, I would plan, stress, decorate, and stress some more for weeks and weeks before one of my kids’ birthday parties!  But, honestly, I took the laid back approach (who am I kidding), and pulled it all together in a couple of days using some of our decorations from last years Pinkalicious party and some great colorful paper décor from Party City.


IMG_1168


The best part of this birthday bash was that the birthday girl was in on all of the planning.  I think it made her feel a little more grown up help plan the party and keep it a secret from her friends. 
She wanted a sleepover for her birthday party, but we just felt like age 7 was a little too soon for our family.  So we came up with the idea of a daytime sleepover.  A kind of “pretend” slumber party!
So, instead of a nighttime party, we had an early morning pancake and pajama fest!  I contacted all of the moms ahead of time and asked them to have the girls dressed in their “going out” pj’s.  They were to keep everything a secret from the girls.  We only invited the number of girls that we could fit in our SUV.  We headed out early, just “A”, me, and our favorite 13 yr old friend “S”, who was riding shot gun :)
By 8 a.m. we were ringing the doorbells at the homes of some sleepy but excited little girls.  Actually, they were a bit confused at first as to why were were at the door in our pj’s and why we wanted them to come with us!  It was cute!  But the moms had the sleeping bags packed, and we were well on our way to the next pick up in no time. 


IMG_1158


And so the group of giggly girls grew as did the excitement and anticipation of who was to ring the doorbell and explain our fun plan to the next girl on the route.  By the time we reached the last house, we were picking up two girls- sisters.  The oldest ran AWAY from the door shouting “I’m not properly dressed to go out!” It was hilarious!  We quickly got her back on track by pointing out that we were ALL wearing pj’s for the party!


IMG_1163

With the car packed full of giggly girls and sleeping bags, we were well on our way home for a bacon and pancake breakfast with all the toppings.


The ingredients for our sugar coma included:
-Home made pancakes
-mini- M&M’s
-Cherries
-Whipped cream
-chocolate syrup
-maple syrup
- chocolate chips
-blueberries
-strawberries
-Bacon


The girls were hungry and excited and dug right in.  Plates were piled high with all forbidden breakfast foods :)

IMG_1179


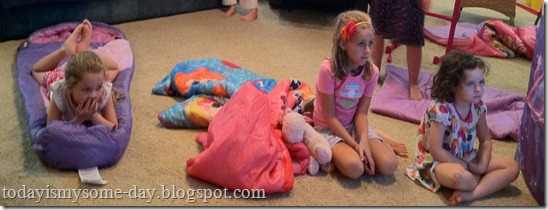
After everyone had eaten enough sugar, they all took their sleeping bags upstairs to our bonus room to spread out for their sleepover. 

IMG_1189


We put on a movie for them while hubby assembled the cake in the kitchen.  We wanted to stay with the pancake/sleepover theme, so hubby made this chocolate pancake stack from zoomyummy as a cake.  Click on over to see her beautiful photo of what it could look like.  Ours turned out more like this…

IMG_9376
(Never you mind that rainbow “7” candle!  My girl picked that out weeks ago from the grocery store.  So we definitely HAD to use it)


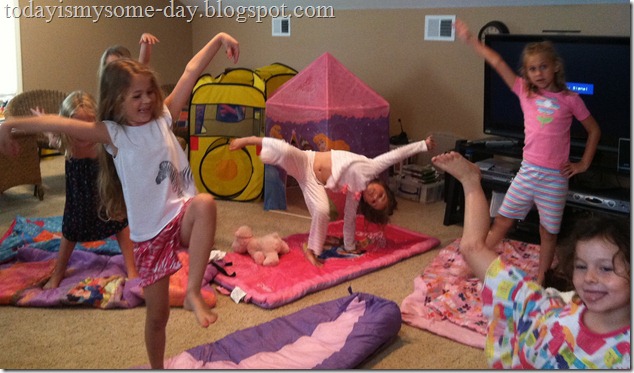
While the cake was coming together, the girls played a couple of rounds of musical sleeping bags.  It was quite funny watching them scramble around the room to hop on a sleeping bag when the music stopped, because the sleeping bags were so slippery! 
Next was the impromptu dance party!


IMG_1181
Fun!


IMG_1182
Karate kid? Stayin’ Alive?


Cake time:


IMG_9379
anticipation….


IMG_1197
mmm… it was good!


Overall, this was a quick and easy to plan party with great results!  The girls had a blast, and not one of them came up and asked why I didn’t bust out the Silhouette machine and make pajama shaped garland! 

Our very favorite part of the whole party was surprising our friends!  “A”’s anticipation and the girls faces as they opened their doors and saw us standing there in our pj’s was worth all the last minute scrambling around.
What a FUN surprise :)


Happy birthday to my very favorite 7 year old!

Love,


Mommy


Linking up to these great parties:
Uncommon Designs 


The 36th AVENUE