Wednesday, August 29, 2012

Welcome back Scrabble


I’ve been scouring the thrift stores looking for original Scrabble games to use in a little project that’s been brewing in my brain for quite some time.  I’ve seen lots of Scrabble art- big and small.  And this may not be an original idea, but it’s original in my tiny world, and it makes me smile : ) 
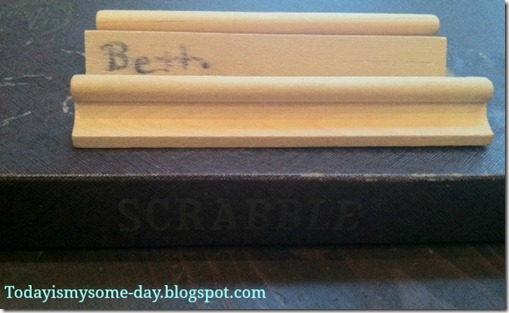
scrabble bare.jpg

This set belonged to “Beth”, and she was quite attached to it.  All of the owner’s paperwork was filled out and many of the trays were labeled with her name.  I’m sure she played many games of Scrabble at her friends’ houses, but wanted to be sure she got all of her pieces back!
Well, since this set was from the 60’s, I’m sure that “Beth” wouldn’t mind if I updated it a little…

welcome scrabble.jpg


just in scrabble.jpg

onsale scrabble.jpg

I’m using these little beauties all around my booth on my furniture pieces to attract the customers’ eye and to show off some of my paint colors and finishes.  These are just some basic Annie Sloan colors with a little distressing and dark and clear wax.  But I have more trays and plan to mix some colors and make more eye candy in the near future. 

turquoise distressed table and scrabble tile.jpg

I used a single piece of scotch tape on the back of each word to keep the letters together.  It has worked great!  The “Welcome”  below has been in my booth for a couple of months, and it’s still in tact despite my own kids and other shoppers’ kids playing with it.


Have you played any Scrabble lately?

 

  Linking up to these great parties:  
 

UndertheTableandDreaming
A Diamond in the Stuff

Thursday, August 9, 2012

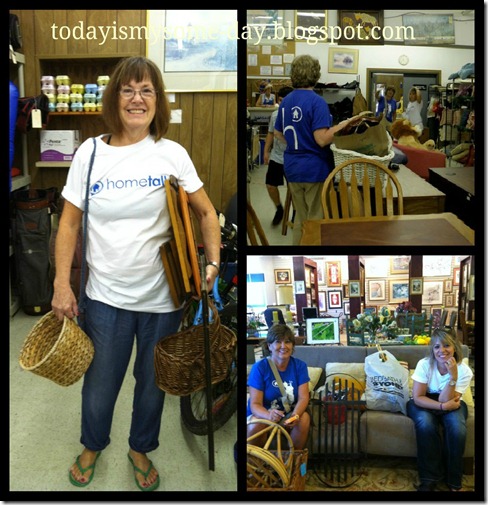
Our Big Hometalk Thrifting Trip


When Debbie at Refresh Restyle contacted me to ask if I wanted to be a part of a thrifting day, I jumped at the chance!  I {heart} thrifting! 

When I found out that Hometalk was sending 8 of us out on this little journey with matching T-shirts, I was beyond excited!

Here, we are before we hit the road.  We paired up in teams of 2, kind of like the Amazing Thrifting Race!  Not really, we were all pretty civil; we just needed 4 vehicles to haul our goodies back home. 

thrifting group shot

We drove and chatted with much excitement!  We got lost; we waited in line to get in to one store while instructions were blasted over a loud speaker (serious business!)  We walked/ran through stores.  We sat on/claimed furniture as our own.  We found treasures for ourselves and for our sister thrifters.

inside thriftcollage.jpg

 Mary and I packed and re-packed our vehicles several times.  Toward the end of the day, I heard bids going on for the last amount of space available in Cherry’s vehicle!

rearranging.jpg

Our Loot:

ourloot.jpg

I’ll be posting some pictures later on of the makeovers or makeunders of the things I thrifted on this trip. 
But for the sake of fun, I wanted to show you a few of the things that we DIDN’T buy!  You know the kinds of things that non-thrifters think all thrift stores are filled with…
Here we go.  Giggle :)

None of this came home with us….

weird thrift.jpg

How about live music at the thrift store on the weekends?  He was singing Elvis, I believe…

guitar.jpg


We got so much great stuff.  I still can’t believe it.  We shopped ‘til we almost dropped!  Didn’t stop for lunch until almost 4 p.m. 

lunch photo.jpg

Our Thrifty Sisters were Debbie from The Smart Set; Karen and Mary from Cotton*Wood Furnishings; Cherry from Cherry’s in the Garden and More; Sarah from Unto the Rainbow; Ann from Shabby French Cottage Basement; and our Coordinator for the event Debbie from Refresh Restyle.

Besides our loot, our lunch and conversation was the best part of the day!  Girlfriends chatting it up about everything from bargains, to paint, to woodworking, to relationships.  We had the best time!  We are hatching a plan to do another one of these trips very soon…  Thanks Hometalk!


End of the day ~Everyone's haul....

Happy Thrifting!

Kim

Friday, July 27, 2012

*Surprise your Friends* Daytime “Sleepover” Party


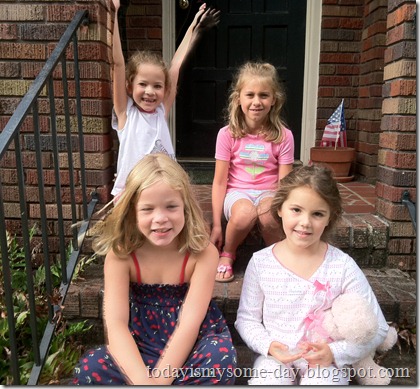
I can’t believe my little girl is 7 years old already!  We were planning a party for a couple of weeks from now.  But, we had some scheduling conflicts, and I had to put the party together in 3 days!  This is UNHEARD of in this house!  Normally, I would plan, stress, decorate, and stress some more for weeks and weeks before one of my kids’ birthday parties!  But, honestly, I took the laid back approach (who am I kidding), and pulled it all together in a couple of days using some of our decorations from last years Pinkalicious party and some great colorful paper décor from Party City.


IMG_1168


The best part of this birthday bash was that the birthday girl was in on all of the planning.  I think it made her feel a little more grown up help plan the party and keep it a secret from her friends. 
She wanted a sleepover for her birthday party, but we just felt like age 7 was a little too soon for our family.  So we came up with the idea of a daytime sleepover.  A kind of “pretend” slumber party!
So, instead of a nighttime party, we had an early morning pancake and pajama fest!  I contacted all of the moms ahead of time and asked them to have the girls dressed in their “going out” pj’s.  They were to keep everything a secret from the girls.  We only invited the number of girls that we could fit in our SUV.  We headed out early, just “A”, me, and our favorite 13 yr old friend “S”, who was riding shot gun :)
By 8 a.m. we were ringing the doorbells at the homes of some sleepy but excited little girls.  Actually, they were a bit confused at first as to why were were at the door in our pj’s and why we wanted them to come with us!  It was cute!  But the moms had the sleeping bags packed, and we were well on our way to the next pick up in no time. 


IMG_1158


And so the group of giggly girls grew as did the excitement and anticipation of who was to ring the doorbell and explain our fun plan to the next girl on the route.  By the time we reached the last house, we were picking up two girls- sisters.  The oldest ran AWAY from the door shouting “I’m not properly dressed to go out!” It was hilarious!  We quickly got her back on track by pointing out that we were ALL wearing pj’s for the party!


IMG_1163

With the car packed full of giggly girls and sleeping bags, we were well on our way home for a bacon and pancake breakfast with all the toppings.


The ingredients for our sugar coma included:
-Home made pancakes
-mini- M&M’s
-Cherries
-Whipped cream
-chocolate syrup
-maple syrup
- chocolate chips
-blueberries
-strawberries
-Bacon


The girls were hungry and excited and dug right in.  Plates were piled high with all forbidden breakfast foods :)

IMG_1179


After everyone had eaten enough sugar, they all took their sleeping bags upstairs to our bonus room to spread out for their sleepover. 

IMG_1189


We put on a movie for them while hubby assembled the cake in the kitchen.  We wanted to stay with the pancake/sleepover theme, so hubby made this chocolate pancake stack from zoomyummy as a cake.  Click on over to see her beautiful photo of what it could look like.  Ours turned out more like this…

IMG_9376
(Never you mind that rainbow “7” candle!  My girl picked that out weeks ago from the grocery store.  So we definitely HAD to use it)


While the cake was coming together, the girls played a couple of rounds of musical sleeping bags.  It was quite funny watching them scramble around the room to hop on a sleeping bag when the music stopped, because the sleeping bags were so slippery! 
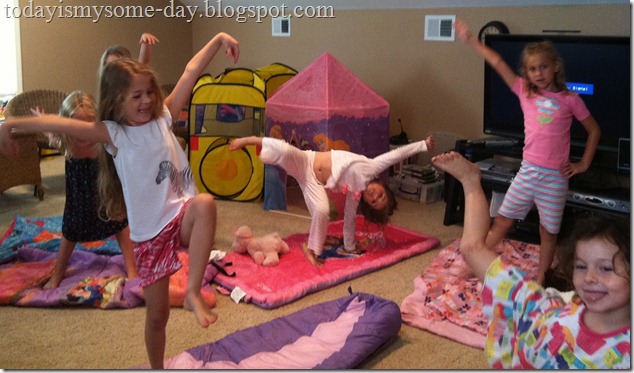
Next was the impromptu dance party!


IMG_1181
Fun!


IMG_1182
Karate kid? Stayin’ Alive?


Cake time:


IMG_9379
anticipation….


IMG_1197
mmm… it was good!


Overall, this was a quick and easy to plan party with great results!  The girls had a blast, and not one of them came up and asked why I didn’t bust out the Silhouette machine and make pajama shaped garland! 

Our very favorite part of the whole party was surprising our friends!  “A”’s anticipation and the girls faces as they opened their doors and saw us standing there in our pj’s was worth all the last minute scrambling around.
What a FUN surprise :)


Happy birthday to my very favorite 7 year old!

Love,


Mommy


Linking up to these great parties:
Uncommon Designs 


The 36th AVENUE


Monday, June 25, 2012

Pool Noodle Dragonfly


So, I wrestled a pool noodle in order to party with the cool girls at the Pool Noodle Party.

reFresh reStyle
                                                                      Party Hosts Debbiedoo’s

This thing was going to be a wreath, a skate board, and a flower!  But ultimately it became what it was meant to be… a shabby little dragonfly.

June 26 2012 200

Here are the materials needed to make your own shabby dragonfly from a simple pool noodle.

-Pool Noodle
-strips of torn drop cloth
-ball of twine
- thin wooden dowel
-one pants hanger (wire top cardboard bottom)
-straight pins
-hot glue

June 26 2012 194

1- cut your pool noodle in half long ways and then in half the other way.  Like a loaf of bread waiting to be buttered…mmm…

2- tear many many many strips of drop cloth and pin the ends to a piece of noodle and wrap.  This is the longest step, so put on your DVR’d episodes of “Junk Gypsies” while you wrap.

3-  Once your 4 “wings” are wrapped and cinched in at the ends with the strips of cloth, take another half of a regular pool noodle and begin wrapping it in cloth.  Sounds like we are mummifying something doesn’t it?

4- Then use your wooden dowel to attach the wings to the “body” noodle.

June 26 2012 197
Hubby is helping out here :)

5- Once the dowels are in, wrap the dragonfly some more.  Criss-cross across the body and pin on the back side to be sure that everything is nice and secure.

June 26 2012 198
blurry close up…

6- Once your dragonfly’s body is made, then roll some twine to form 2 eyes and hot glue them on.  Simple.

June 26 2012 208


7-  Poke a hole in the top of your little guy, and bend the coat hanger top straight and drop it right in.  I used a little hot glue to secure the antennae.


June 26 2012 202
close up of the antennae

So folks, there you have it.  My very last minute pool noodle creation.  I told Debbie at Refresh Restyle that I’d be late to the party, but I’d be there. 
My motto seems to be…

last minute

I was gonna be lame and just use my iPhone to take the pictures, since I was running so late to the big bash!  Well, I changed my mind and used my “good” camera.  Did you notice the fabulous quality of my photos???? Did ya?  Oh, well, with only a few minutes before the party started, I CANNOT FIND THE FILE WHERE MY PICTURES UPLOADED!!!!!  I must be crazy!  So here are some rather crappy iPhone pictures of my pool noodle project :)


I made it to the party Debbie! Oh, and I brought a date!  My shabby little dragonfly. 

 June 26 2012 200


Linking up to The Pool Noodle Party

Saturday, June 2, 2012

The desk that had wings (and a little secret)


I love furniture make-overs!  I love them even more when they surprise me! 
I bought this funky little desk from a local thrift store and I had to ask a fellow customer in passing about it’s “wings”…

may 22 2012 610

He said that they were for you to rest your elbows on while you work.  Okay…

As with all furniture around here, this one sat in the the garage marinating for a couple of months before I started on it.   *That’s my excuse for the furniture hoarding*

First I cleaned off the top to try to get rid of those rings and dirt.  They didn’t come off easily, so I got out my electric sander with some 150 grit sandpaper.  The yuck came right off and much to my surprise I found the most beautiful yellow chippy paint underneath that faded white.  I went all around the skirt and legs to expose some of the yellow everywhere.  The top had these wonderful wormholes and chippy paint….


may-22-2012-6141[1]

It was then that I decided that this desk did NOT need to be painted!  I just cleaned it up and sanded it to show the beautiful yellow.  I then made the
 difficult decision to REMOVE THE YELLOW WINGS!  I know, I know.  It’s a tragedy to take off those cool elbow rests.  But honestly, there was a little drawer under those wings that couldn’t be used with the wings intact.  The wings were old and wonky and not really all that pretty the more I looked at them.

may-22-2012-6091[1]
Here it is with the wings closed.  Can’t even see the drawer.
So off they came… 

may 22 2012 615

A little more sanding…  That electric sanding is kinda addicting isn’t it?  I then used a clear poly to go over the top and chippy sides. I wanted to retain the “chips”.  I knew I’d be taking this to my shop.  I always touch furniture before I buy it, and I imagine most people do.  I envisioned coming in to find the cute little desk sitting next to a pile of paint flakes on the floor.  Oh, the horror!! 

Here she is all prettied up in my side yard before I threw her in the car with 2 minutes to spare before picking up my kids from school :) Or should I have said “gently placed her in my car to take her to my booth for sale.”?  Either way, here she is…

may 22 2012 620


Oh, and I replaced this knob with a dark brown wooden one right after this picture….

I took it in to the shop on Thursday afternoon, and I was in the store on Friday morning when a cute young couple came in and was looking at it.  They stalked it a while and then told me they had to have it for their wedding.  Their wedding colors are to be yellow and white.  I think I was as excited as they were to see this sweet little piece go home with them!


Happy Wedding sweet couple!

Happy Weekend ya’ll!


Linking up to these great parties:


Visit My 1929 Charmer Blog!


Weekend Bloggy Reading

Thursday, May 3, 2012

Annie Sloan’s Napoleonic Blue-yes! Old White-not so much…


I’m here with a great little table that I just painted with Annie Sloan’s Napoleonic Blue.  I then sanded her to make sure she felt the love, and applied dark and clear Annie Sloan’s waxes.  Now she’s been buffed to a beautiful shine!  I love her! 

April 26 2012 012

I just popped open this can of Napoleonic Blue for this table.  There is just something special about opening a new can of paint.  It’s so exciting! 
I felt that way the first time I opened a can of Annie Sloan’s Old White chalk paint.  But I have never had the same love affair with the Old White that I have with the deeper colored Annie Sloan paints.  I don’t know if it’s the difference in pigments.  I do not claim to know ANYTHING about the make-up of paints!  But I do definitely notice a difference in the consistency of my Old White can(s) versus my Napoleonic blue or Antibes Green or Emperors Silk colors.  Those colors just glide onto the piece, making it beautiful almost instantly.  The Old White makes me WORK harder!  I’ve been told to add a little water, and I have added some to my working palette on occasion.  I honestly don’t blame Annie or her Old White mixture for this problem.  The results can be amazing! 
I painted this table a while back with Old White, and have gotten great feedback from the gal that purchased it!  That makes me so happy!

imported Mar 26 2012 513

But, I think the bottom line is that the COLORS are calling me! They make me happy!  My paintbrush loves them!  And my booth just thrives when I add color!
Don’t worry, Old White, I can’t live without you!  You are the original… but I am stepping out of the box-for now!

Happy Thursday to you!


**Oh, and "Beautiful Blue" has already sold, so I won't be bringing her home to live in my sunroom where she fit in so nicely...**


Linking up to these great parties:

Crafty, Scrappy, Happy Me Thursday,